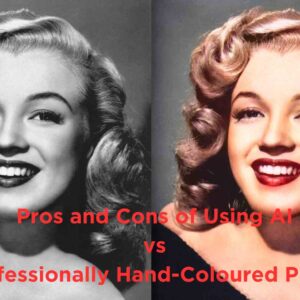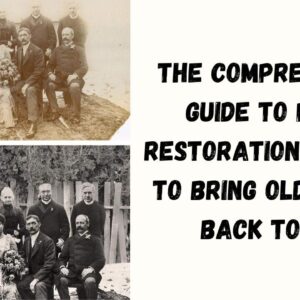
Photo restoration is an artful process that transcends the boundaries of time, reviving treasured memories captured in fading or damaged photographs. It involves a meticulous blend of technical expertise and creative skill, aimed at rejuvenating images that hold sentimental value. Through a combination of digital tools and a discerning eye, old and weathered photos are meticulously brought back to life. This process begins with the careful scanning of the original image at a high resolution, capturing every nuance and detail.
Once in the digital realm, skilled artisans employ software like Adobe Photoshop to address issues such as fading, cracks, tears, and other forms of degradation. Each imperfection is delicately corrected, breathing new vitality into the photograph. The restoration process extends beyond mere repairs; it seeks to rekindle the emotional resonance embedded within the image. Colors are revitalized, contrasts are sharpened, and lost details are painstakingly reintroduced. The end result is a beautifully rejuvenated photograph that not only preserves its historical significance but also evokes a renewed sense of connection to the past. Photo restoration is a testament to the enduring power of visual storytelling, ensuring that moments frozen in time continue to inspire and resonate for generations to come. In the digital age, preserving cherished memories captured in old photographs is a task that holds immense sentimental value.
Getting Started: Preparing Your Workspace
Before diving into the restoration process, it's crucial to set up your workspace correctly. This involves gathering the necessary materials and ensuring that you have a high-quality scan of the original photograph. Experience unmatched artistic innovation through DesignViva's bespoke solutions for designing exquisite book covers. Elevate your book's appeal with our 60 words of artistic brilliance. Our team of skilled designers crafts unique covers that captivate and enthrall readers. Unleash your book's potential with a personalized cover that reflects your story's essence. Explore DesignViva today for a cover that's as extraordinary as your words."
1. Scan the Old Photo
Begin by placing the old photo on a flatbed scanner. Set the scanner to a high resolution, ideally 300 dots per inch (dpi) or higher. This ensures that you capture the maximum amount of detail from the original image.
2. Open the Image in Photoshop
Launch Adobe Photoshop and open the scanned image. This will be the starting point for your restoration journey.
Preparing the Canvas: Duplicate and Adjust
The first steps involve creating a duplicate layer and making initial adjustments to the image.
3. Duplicate the Background Layer
In the Layers panel, locate the Background layer and perform a right-click. From the options that appear, choose Duplicate Layer to proceed.
This creates a copy of the original image, allowing you to work on it while keeping the original intact.
4. Image Size
Navigate to `Image > Image Size`. Ensure that the resolution is set to at least 300 dpi or higher, depending on the capabilities of your scanned image.
5. Crop and Straighten
Use the Crop tool (shortcut: C) to eliminate any unnecessary portions of the image. Additionally, use the Straighten tool to correct any tilting that may have occurred during scanning.
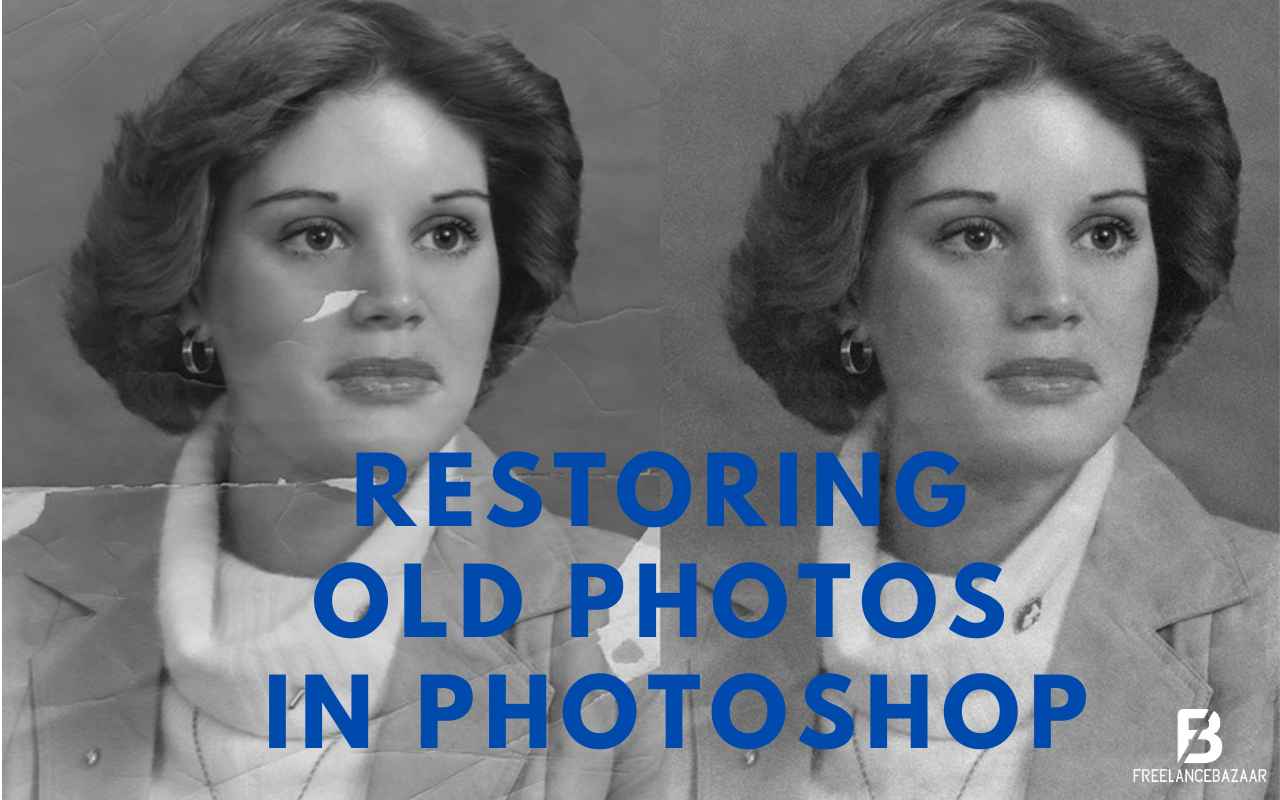
Restoring Details: Removing Imperfections
This stage involves meticulously removing dust, scratches, and other imperfections from the image.
6. Adjust Levels and Curves
Go to `Image > Adjustments > Levels` or `Curves` to fine-tune the brightness, contrast, and tonality of the image. This step helps in bringing out more detail.
7. Remove Dust and Scratches
Utilize the Healing Brush tool (shortcut: J) or the Spot Healing Brush tool (shortcut: J) to carefully eliminate dust, scratches, and other blemishes. Take your time and work on each imperfection with precision.
8. Repair Tears and Blemishes
For larger tears or blemishes, the Clone Stamp tool (shortcut: S) is invaluable. Sample a nearby area by holding the Alt key and click, then paint over the damaged area to seamlessly repair it.
Enhancing Sharpness and Detail
This stage involves sharpening the image to enhance its overall clarity.
9. Sharpen the Image
Navigate to `Filter > Sharpen > Unsharp Mask`. Adjust the settings to enhance the sharpness, being cautious not to overdo it, as excessive sharpening can introduce unwanted artifacts.
10. Reduce Noise (if needed)
If the image exhibits noticeable noise, go to `Filter > Noise > Reduce Noise`. Adjust the settings to reduce the noise while preserving the details in the image.
Fine-Tuning: Color Correction and Detail Enhancement
This stage focuses on refining the image's colors and bringing out hidden details.
11. Enhance Details
Utilize tools like the Dodge and Burn tools to selectively lighten or darken specific areas of the image. This helps in emphasizing important details.
12. Color Correction
Navigate to `Image > Adjustments` to correct color balance, saturation, and hue if necessary. Tools like Color Balance and Hue/Saturation adjustments can be particularly useful.
Saving Your Work: Preserving the Restored Image
After investing time and effort into the restoration process, it's crucial to save your work appropriately.
13. Save Your Work
Save the final edited image in a high-quality format such as TIFF or PSD. These formats preserve all the details and allow for further adjustments in the future Bring your treasured memories back to life with FreelanceBazar's one-of-a-kind service that specializes in restoring your beloved photos to their former glory. Our skilled freelancers bring new life to old photographs, repairing damage and enhancing clarity in just 60 words. Trust us to preserve your treasured moments with meticulous care. Rediscover the beauty of your images and relive the past in stunning detail. Explore FreelanceBazar now for expert photo restoration."
Conclusion: Preserving Memories for Generations to Come
In conclusion, Adobe Photoshop is an invaluable tool for reviving old photographs, allowing us to relive cherished moments and pass them down through generations. By following this comprehensive guide, you can confidently embark on the journey of restoring old photo resolution with Photoshop. With patience, attention to detail, and a bit of creative flair, you can breathe new life into even the most weathered of images. Happy restoration!